I know everyone is telling you to breathe. And I know how annoying it can…
Movement
Why You Need to Stop Doing Kegels & Do This Instead
November 1, 2021 • By Alissa Alter

This may be hard to hear, as someone who was recently pregnant and birthed a new human, but here it is: you can stop doing kegels. And if I’m being perfectly honest, which you know I always am, you should stop doing kegels.
Gasp! The horror! How could she?!
I know. I get it. I too got the message loud and clear that anytime there is any issue “down there” the answer is kegels.
Leaking urine? Kegel.
Painful sex? Kegel.
Better orgasms? Kegel.
Kegel. Kegel. Kegel.
I’m not saying this because I’m jealous like Jan Brady was of Marsha. I’m saying this because I love you. The same reason I told you that your Yoni doesn’t need an egg. And I hope you aren’t too mad at me, and can read this with an open mind, as I continue making my case against kegels.
Let’s start by defining what a kegel is…
A kegel is an exercise for the pelvic floor muscles where you engage the muscles that stop the flow of urine.
Your pelvic floor muscles are a hammock of muscles residing at the base of your pelvis. These muscles support the contents of your trunk (read: all of your vital organs) as well as your reproductive and digestive organs. They are constantly working to keep your insides…inside.
The muscles that make up your pelvic floor are voluntary, skeletal muscles just like your biceps, quads, hamstrings, and abdominals. And healthy, functional muscles can both fully contract AND fully release. I go more in depth on this topic (one of my FAVES to nerd out on) in this article.
Still with me? So we are on the same page that the pelvic floor is a hammock of voluntary, skeletal muscles that can be categorized as healthy and functional based on their ability to fully contract AND fully release, right? Awesome.
And as we covered, the job of the pelvic floor is to support all of the organs contained in your trunk (all of them) which during pregnancy includes ANOTHER HUMAN BEING. Plus, a BRAND NEW ORGAN that you created, the placenta.
During pregnancy, the pelvic floor is working overtime. Needing to stay in a more contracted position in order to support the weight of the organs, new human, that new human’s new organs, the other new organ you grew, and a whole bunch of other fluids.
So, if healthy, functional muscles contract AND release fully, and we are addressing a set of muscles that have been in a prolonged state of contraction, is the answer to contract more? Do kegels? To keep building the contract side of things taking us further and further away from releasing?
No way!
Maybe you find yourself experiencing painful sex which can be a result of a variety of things including, but not limited to, vaginal dryness, scar tissue, and perpetually contracted muscles. Based on what we know, does it seem like the solution is to continue to contract these muscles, making it harder for blood and other fluids to fully circulate within the vaginal tissue, further contracting contracted muscles and tight scar tissue?
I don’t think so either!
Lastly, an orgasm is a build of tension, or muscular contraction, followed by a release. If your muscles don’t know how to release because all you do is squeeze them, is that going to give you the orgasm of your dreams?
We both know the answer. HECK NO!
So for many reasons, kegels aren’t helping you to strengthen or regain healthy function of your pelvic floor muscles during pregnancy and postpartum. These muscles are already getting a ton of input to contract from simply being pregnant. And it stays that way postpartum unless you start to teach them to do something else.
Anything else. Like maybe, just maybe, release.
I know it might feel scary to think about stretching a set of muscles that were already stretched beyond capacity. Or a set of muscles that never stretched open and remained contracted as your baby was born via your belly.
But the truth is, in both cases, in all scenarios, what your pelvic floor and your back, and your nervous system needs is some release. And we have the best way to safely, directly, effectively, holistically release stretch and actually tone the pelvic floor.
Are you ready?
You’re not going to believe this. Are you sitting down? Great.
Breathing.
Yeah, I said it. I know it seems too easy. And that there’s no way there’s a solution related to motherhood that is this easy, accessible, and free, but it’s true.
And we have a breathing technique for you to incorporate your pelvic floor more deeply into your breathing (which you do all day every day) and make your pelvic floor dreams come true.
I’m talking about…
Confident sneezes
Pain free, pleasurable sex
Full scale orgasms
What is it? Viloma breathing. And there are two versions, brought to us from pstprtm co-founder Anne Omland.
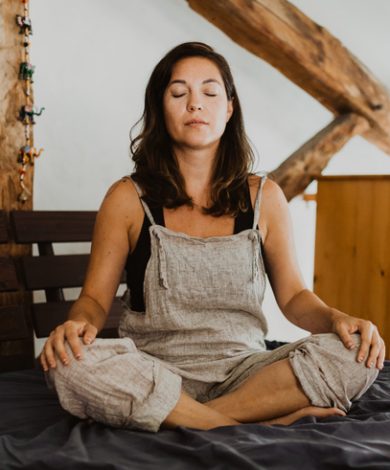
In order to know which is best for you TODAY, try sitting or lying down, and closing your eyes. Take a minute to feel into your body, witness your natural breath and observe how you’re feeling. What do you need more of? Calming or energizing? Cooling or heat?
It can be easy to overthink this. And there’s no need to. Take some deep breaths and whichever comes to mind first, go with that. Your body knows which Viloma is best for you today.
There are variations on the Viloma Pranayama and I’m going to explain and share Viloma I and Viloma II. So before going any further, let’s clarify what these two practices are, the ways they are alike, and how they differ.
Viloma I, or interrupted exhale, creates coolness in the body which is great for if you’re feeling anxious, stressed, overwhelmed or fatigued.
Viloma II, or interrupted inhale, creates heat in the body. If you’re feeling sluggish or low on energy, or not as sharp mentally, this breath helps with bringing motivation and focus.
To get started, imagine your torso in thirds.
The first third from the crown of the head to the top of the chest.
The second third from the top of the chest to the Solar Plexus or Xiphoid Process.
The bottom third from the belly button to your root chakra or tailbone, the base of your spine.
Whether we’re inhaling or exhaling, drawing breath in or releasing it out, you’ll use the same “measurements” to determine where and when to retain the breath.
Note: I say “retain the breath” in place of “hold the breath” because holding implies gripping onto something or having control over it. Retain, however, means to continue to have something or absorb. It feels more dynamic rather than static.
When retaining the breath like this, your body starts to recruit, rebalance, and incorporate the pelvic floor in relation to the diaphragm. You can allow this to happen naturally or utilize this relationship more deeply. Learn about how to incorporate your pelvic floor in your Pranayama practice intentionally here.
Viloma I
- Beginning with a cleansing breath, inhale deeply, exhale fully.
- With the eyes closed, allow yourself to accept a full inhale from the root of your spine to the top of your head, filling up your entire trunk 360 degrees.
- Retain the breath at the top of the inhale, at the peak.
- Without straining or forcing, smooth and even breath, exhale the top third of the breath, saving some air in your lungs for the other two thirds.
- Retain the breath for a beat.
- Exhale the second third to the solar plexus.
- Retain the breath for a beat.
- Slowly exhale all the way out.
Inhaling fully again to the top of the crown, retaining at the peak for a beat and then beginning again. Allow your body to soften with each release and exhale.
Viloma II
- Beginning with a cleansing breath, inhale deeply, exhale fully.
- With the eyes closed, allow yourself to accept a full inhale from the root of your spine to the top of your head, filling your body with air before releasing it all out again.
- Start at your root chakra, the base of your spine, begin to fill up the first third of your torso from root to Solar Plexus/Xiphoid Process.
- Retain the breath for a beat.
- Fill up the second third from the Solar Plexus to the top of the chest.
- Retain the breath for a beat.
- Inhale into the final third, accepting in the rest of your breath to the crown of your head.
- Retain the breath for a beat.
- Slowly release all of the air out.
And begin again. Keeping your focus on your body and your breath.
Begin with 1-3 rounds, moving up to 3-5 rounds.
Observe any changes in the body, welcoming the benefits of this simple practice. Save this in your toolbox for when you feel anxious or tired and want to change your state of being.
Center yourself, check in, and try one!
Your breath is always here for you. You can count on it to heat or cool you, to energize or calm or nourish you.
Want more breath practices to explore?
This article is our gold standard, breathing 101 resource. Start here to make your dreams come true. And this article takes you to a whole new realm, shifting your mindset, your nervous system, and utilizing the energy of each nostril with alternate nostril breathing.
Previous
How Do You Juggle Parenthood and a Business? This Entrepreneur Shares 6 Key Ingredients
Next
Looking For The Best Way To Love A New Parent? The Answer Is Food. Here's Why